A diary of all my mad projects.

I am glad that you stopped by - welcome to my world. Its a little mad and hectic as I sew, knit, embroider and generally craft my way through life. My newest resolution is to spend more time sewing - less time dreaming about it. I love to read comments so I am looking forward to hearing from you all.


Friday, July 11, 2014

6 PAC Sewing with a Plan

I make detailed plans for my sewing: but sadly often  they remain as strips of fabric, pictures and pattern numbers.  I take pleasure in creating a journal of the plan but need to move onto the actual task of sewing up the ideas.  It is with pleasure that I find myself completing a plan.
Inspiration for Shirt

I love the croquis from  Fashionary 


My eldest daughter has just completed her undergraduate degree in Architecture and is continuing onto her Masters.  As a poor student she was happy to have Mum make a few things to help extend her wardrobe.  At present she is enamoured with black so that was the base colour, not my favourite thing to sew or wear! I managed to slip in some petrol blue and grey to the mix for some variety.

First up were two tops from Ottobre Spring/Summer 2013.  A draped Tshirt (Lemon Juice No 13) cut on the fold to create the draped side.  This is a  petrol blue merino lycra blend from The Fabric Store in Wellington and I plan to make it in a larger size for myself.  With one piece for the front and back, the side is placed on the fold to create the drape.  


The second top was No 2 Summer Basic, made firstly in a burnout knit from the Auckland Fabric Store branch.  

I adjusted to add 3" length in the back above armhole  and 4"in the front.  The daughter wanted the long at back short at front look so the hem was lengthened.  Made in a beautiful merino knit from The Fabric Shop, Otara this is a great basic quick to make and extremely useful as a layer.

Next time I will shorten the light colour for a better proportion - although it looked good on her.


They looked great on her but unfortunately she disappeared back to Wellington before I could get photos.  She reports that they are getting a good work out in the wardrobe.

Finally a shirt was made from Autumn/Winter 5/2013 No 10 Parisian Chic.  This is a gathered from the yoke loose blouse made in a polyester polka dot.  It went together easily but the fabric was difficult to sew and pulled in places.  I normally dislike polyester but loved the polka dots and the colour.
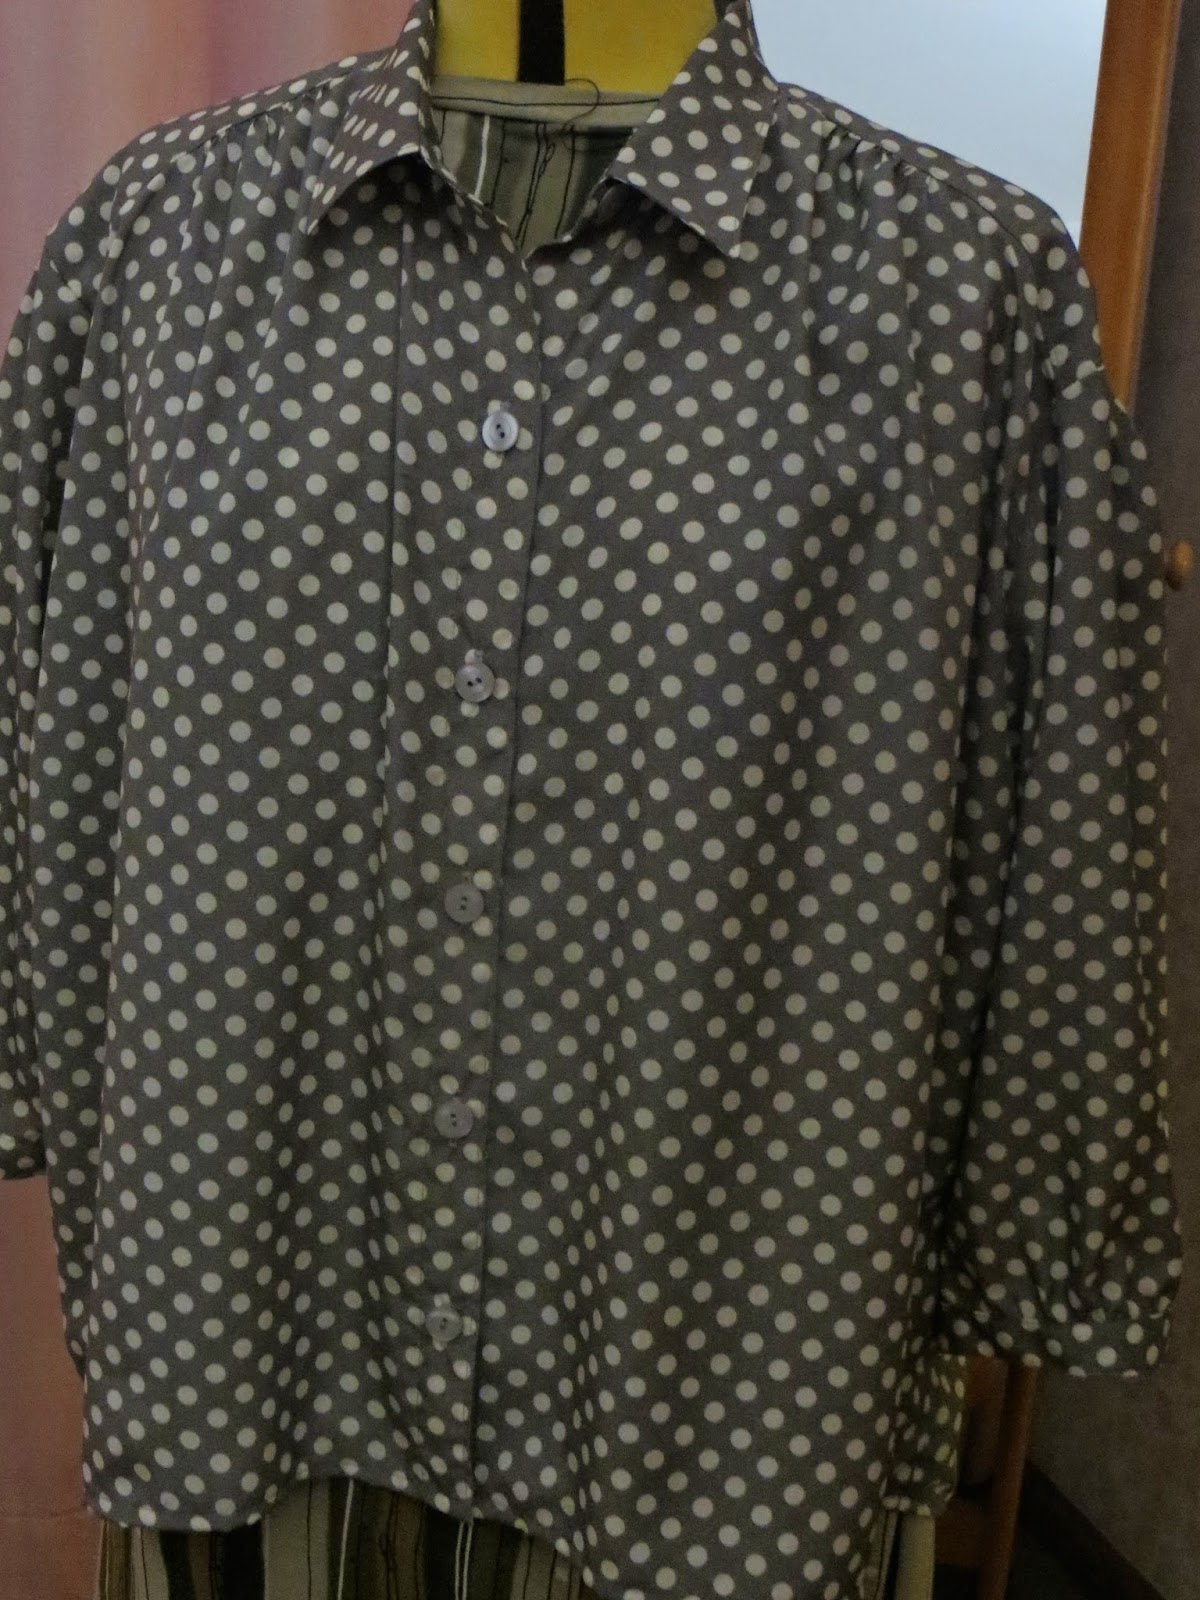


 The gathers on the shirt meant that I did not need to make any alterations for width and she liked the look.  The final garment in the six pack is a Style Arc Skirt which is nearly finished.

Ottobre have some wonderful styles but my first experience with them proved to be disappointing as the dress was not a good fit.  These were all made in Size 46 and were a very stylish fit, I am now convinced to try some other styles in my size so watch this space.


Monday, June 9, 2014

Style Arc Maggie


I am a great fan of Style Arc patterns and the Maggie Shirt is just as good as everything else I have made.


I ordered the pattern in a Size 12 for my youngest daughter but did not get to making it up before summer ended.  At present I am making a collection of garments for the eldest daughter and had extra fabric left over from the Ottobre Shirt and cut the remainder out as the Maggie Shirt.

The pattern is very simple with dolman sleeves and a fly front.  It was this fly front that gave me so much trouble.  Style Arc instructions are more a list of the order to sew and I normally look them over then disregard but this tab front needed lots more.  While separate left and right fronts are cut it was very difficult to visualise how it went together to create the concealed button band (first you have to realise that the buttons were concealed!).  Luckily the wonderful ladies over at Stitchers Guild had the answer.  This tutorial from the blog toile & trouble completely explained the process (now printed out and filed with the pattern) and I was able to redo the front with success.


Once the front was completed it was a breeze to finish the rest of the shirt.  It has a yoke that extends into the sleeve and an inverted pleat at the centre back which gives a nice look as well as providing more room in the back. Unfortunately the fabric is not ideal for this style - a very fluid polyester which sticks to the body and crackles with static very quickly as you can see in the final photo.


Another nice feature of the shirt is the length and the shaped hem; it is very flattering and I am considering getting this in my size.


I will be making this again in time for next summer and think I will try it in a cool cotton with contrasting collar and yoke.


Friday, March 7, 2014

Absences, New Year Resolutions and Samplers.


I am welcoming myself back into the blogasphere - I have taken a break partly due to behind the scene busyness (help finish painting the house anyone?).  Happily I am about to throw the paint brushes away  for a few years with only a little bit of trim to go. 


Fortunately I have been able to fit in some sewing here and there.  Not so fortunately when I cannot get to sew I have a habit of indulging in virtual sewing which includes some not so virtual fabric shopping. So I find that I need to make a few New Years Resolutions regarding sewing up some of these beautiful pieces.

The top ready for joining with the side.

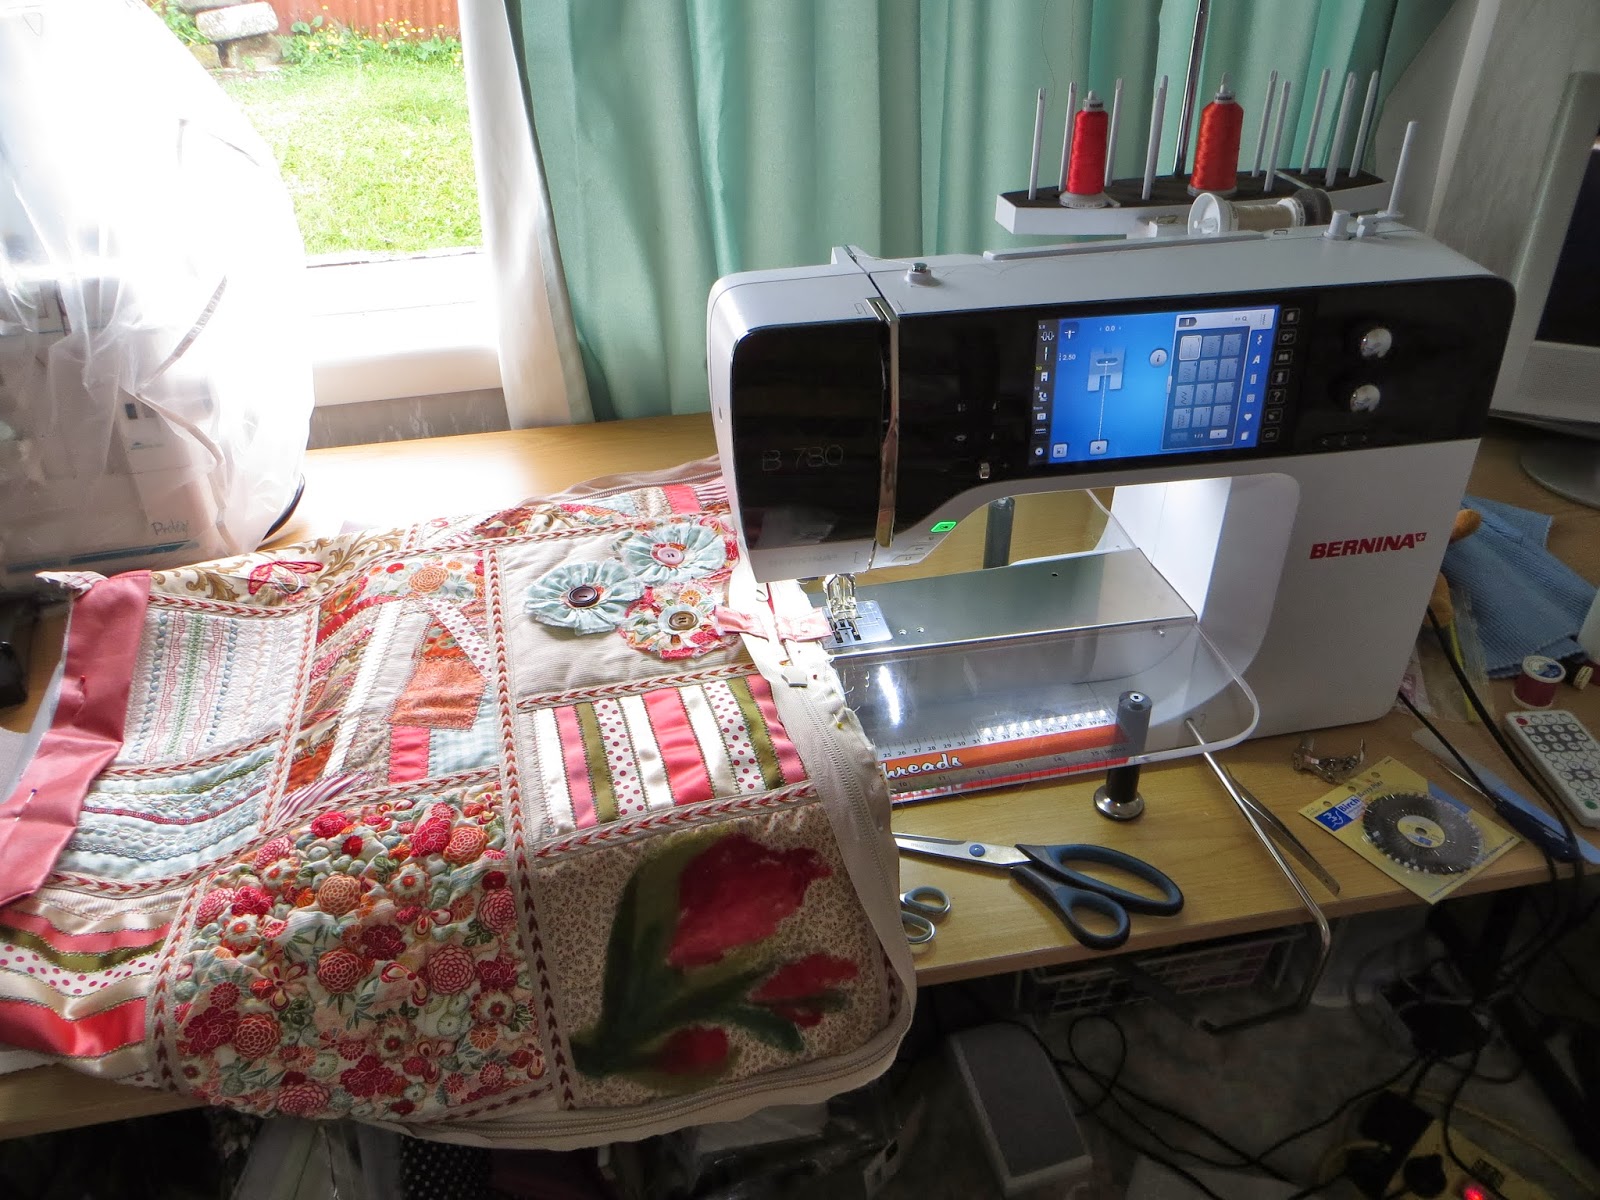
One pleasure I have indulged in is becoming more aquainted with my Bernina 780.  The Tauranga Bernina Centre is amazing for after sales support with the marvelous Robyn providing all manner of classes related to the machine.  Last year we worked on a series of samples (This 'n That Embellishment Sampler from Bernina) which were designed to complete as a cushion etc, however Mr DK is not so keen on more cushions, so I decided to combine these all into a bag/storage dust cover for the embroidery unit.  The intention was to have something that could protect the unit to and fro from 7's class. 


Crazy Patchwork with ribbons and embroidery patterns from the 780.
Each sample was backed with iron on batting then butted together and zig zagged. Placing the samples together took some time and I ended up cutting a few up for a better look.


Each join was covered over with this tape from the stash which I have had for over 20 years. I love the way the pattern arrows run all over the place rather than in one direction


The bottom of the bag ready for assembly.
As the lining and side fabric I used a chintz from the stash.  I used some of the large embroidery patterns from the 780 to embellish the side - I padded with the iron on batting before embroidery.


 Assembling the bag had its issues as it was a plan as you go project! I used a very stiff batting (not sure what it is called) between the lining and the outer layer and two continuous zips along the top. After lots of tacking and recutting I finally hand stitched the lining to the top and added the embroidery unit.

The completed bag.

A special flap was added to attach the top of the bag to the side and hide the ends of the zips.

Fabric stops added to continous zip ends
 And here is the unit in its specially made bag - the twill handles support the unit when tipped up for carrying and there is room for all sorts of odds and ends.


In the top of the bag I added a pocket to hold all the special hoops so that they are altogether.


Wednesday, December 4, 2013

Subtropical interludes and encores


Recently I had the opportunity to spend some time with the husband in Brisbane,  he has been based in the inner city instead of the desert as normal.  He hates the city but I enjoyed the experience.

I spent my days exploring the shops and got very excited to be able to see (and touch) so many designer clothes etc rather than rely on photos for inspiration.  I fell in love with a Giorgio Armani handbag 


Image from http://www.savoirflair.com/


Sadly this remains in Brisbane for obvious reasons but I loved the simplicity of  design and will look around for something similar locally.

I had great fun acting the tourist visiting the South Bank and all the art galleries and museums – a highlight was the Afghanistan Hidden Treasures Exhibition.  It was well worth the fee and very interesting to learn more about the Silk Route and the role Afghanistan held at this time. 

I also stopped off at the California Design Exhibition and loved this dress and then spent way too much at the Gallery Shop, which had so many cool old-fashioned toys and art bits and pieces.


No trip can be without fabric so I set off to Alla Moda, as recommended by Lynda,. After a train trip then a longer than intended walk I entered another world of fabulous fabric.  The fabrics were sensational but pricey – I wonder if they ever have a sale? This is what came home with me; a gorgeous Italian silk print , and a remnant of fine cotton sateen.  


Italian Silk Border Print


Cotton Sateen
The youngest D has her eye on the silk as a easy top from Burda and the sateen is aging in the stash.


Back at home and an encore featuring the wonderful Heidi Cardigan.  First another version for me out of a fine cotton sweatshirting., this time I decided to line the hood.  I do not like this, it makes the hood a lot heavier.


Next up the youngest had requested a hoodie for herself.  She wanted it in the same fabric as mine.  I made her version in a Size 10 and she loves it!


Saturday, November 2, 2013

Tootsie Revisited


Time out for a project can change perspective and this holds true for the Tootsie Top.  
I was very ambivalent about the first version. I let it sit and posted all about how I perceived this top for my body.  The response I received about the top has prompted me to remake this in a plain viscose lycra knit.
I made a few changes - firstly I added to the side seams by about 1cm (and forgot about adding to the diagonal pattern piece side seam! so had to ajust slightly on that side seam.) and changed the back neck facing and ended up folding it over after completing the shoulder seams for a cleaner finish - Anne does it much better on her version.


I also was much more careful to mark the knotches and used my favourite tailors tack method.   The seams went together easily once again using the chain stitch but this time I sewed the tucks closer to the edge (0.5cm) and I like the effect better.

I made the sleeves longer but as I have very short arms had to fold out in a couple of places as normal. The fabric is cool to wear and I can see myself wearing this out in the evenings.


I am still not so happy with the neckline and would prefer it a little lower to deflect away from the chins LOL but it still is not to bad.  I much prefer the plain one colour version but I wonder what it would be like as a colour block version? Or is is that too yesterday?


                                                                 What do you think?


I have changed my mind about this pattern but am not sure how many Tootsies one needs in the wardrobe.

I have made multiple Anne Tshirts and continue to make more for this year but that has become a TNT for me.  One factor for me is the difficulty getting an easy and clean finish at the neckline and shoulder on the Tootsie.  What is it about a pattern that makes it a repeat candidate?

As I probably will not make this pattern again I have drawn out Dorothy's name to send the pattern and fabric.  So if you could email me at jacquiannehooper at gmail dot com I will get the fabric and pattern away to you.


Friday, October 18, 2013

Style Arc Tootsie and a giveaway

Style Arc Tootsie Top October's Freebie
I am on a trouser making binge and ordered a few from Style Arc this month to continue the fitting nightmare journey.  Accompanying the patterns was this months freebie and it looked very interesting - so interesting that I bought some fabric and made it!  


The fabric was from the wonderful Fabric Shop (previously Designer Textiles in Otara) and is a cotton/lycra knit in a dainty shellpink/beige and black stripe.  I have been consulting colour books again and the advice for one such as my colouring is to reduce the contrast between two colours that I wear.  So I can wear black stripes as long as I mute the contrast such as this fabric.

I made the pattern up in my usual Size 20 and decided not to add any extra insurance on seams as the front looked like a rather complicated puzzle.  Style Arc has provided pictures showing how to make up along with the written instructions but I found them hard to understand until I actually had the pieces in my hands to follow instructions.

The first difficulty was working out the way the front pieces went as my stripe had an up and down side - I ended up putting the lighter stripes upwards and the darker thicker stripe underneath.  Cutting out after working this out was a breeze and very quick as only one layer was required.

The first step in making this top was to iron the tuck allowances (which then form the neck line and fold over the seams).  I decided this was an excellent time to use the Babylock chainstitch on the Coverseamer and resulted in beautiful joins of the front pieces with no rippling or stretching.  I highly recommend using this stitch for this top if you have it. 

Somehow I think I have made an error as the diagonal stripe piece ends higher up the armhole that is drawn on the pattern - also it slightly screws upward across the bust.  After assembling the front it was an easy and quick matter to finish the rest (although in my case my overlocker decided to eat the fabric of one shoulder which meant that I spent lots of time unpicking and the neckline might be a little higher than on the pattern).


My daughter, the photographer, said it looked great on me (she is not one for false praise) but I am not so sure.  Firstly it feels a little tight and you can see it pulling across the bust (D cup here). Were I to make it again I would add more to the side seams (now I know where they are) and perhaps lower the neckline a little.  The pattern itself is well drafted and went together without problems (operator error is responsible for the higher neckline as above) once I had the pieces cut out.  

Does anyone else read instructions completely before beginning a project?  I do and the odd time I don't ( see the Style Arc Heidi Cardigan edge problem) always ends in tears, but I have problems with both Style Arc and Burda instructions understanding as I guess they are very brief and understanding does not occur until I actually have the garment pieces in hand and working through the instructions.


I have yet to hem the sleeves and bottom but will finish this top only so I can pass it on - The Bernina Club ladies are always interested in a new piece of clothing!  I bought 2 metres of fabric for this but only used less than a metre - I think the generous measuring of the sales assistant means that there is more than enough for another top.  So if you think you would like to try this top I am giving away the pattern and the rest of the fabric - to ensure that it is morally correct I issue a disclaimer that I have not made a copy as I do not intend making this pattern again.

Please comment if you would like to receive this pattern along with the remaining fabric and I will make the draw next weekend.